大家好,我是皮汤。最近一直在研究 TailwindCSS 相关的内容,打算将其用在接下来的各种项目中,之前也写过关于 CSS 工程化方面的文章:2021 年你需要之前的 CSS 工程化技术,今天给大家介绍一篇关于 Tailwind 最新发布的 v3.0 相关的内容。
2021 年 12 月 10 日,TailwindCSS 的创始人 Adam Wathan 宣布 TailwindCSS v3.0 正式发布,带来了一系列性能上的改进、对开发工作流的改善以及大量的新特性。
那么这颗在 CSS 工程化领域极为耀眼的新星在 v3.0 为我们带来了那些有趣的新特性呢?我们接下来就来一一的介绍它们。
随时随地的 Just-in-Time 模式
Tailwind 2.x 里面引入了一种新的模式,Just-in-Time 模式,可以保持开发和生产构建是一致的,且都是按需构建,相比之前 Tailwind 需要将所有基础的内容进行构建来说大大提升了性能,针对任何构建工具,如 Webpack 只需要 800ms 就可以构建完成,而在之前,可能需要 30-45s。
而且得益于 JIT 模式,Tailwind 支持了 “任意值辅助类” 等一系列新的特性。
之前使用 JIT 时,需要在配置文件里面指定模式:
// tailwind.config.jsmodule.exports = { // ... mode: 'jit', // ...}然后你就可以享受到极快的构建速度,而且可以使用任意值的辅助类,如:
<div class="top-[-113px]"></div>这在之前的 Tailwind 版本中是不允许的,如果需要覆盖这种任意值的情况,你还是得定义一个类名,然后撰写对应的 CSS:
<div class="arbitrary-values"></div><style>.arbitrary-values { top: -113px;}</style> 这种形式显得 Tailwind 比较割裂,所以在 JIT 模式下,因为支持按需构建,所以这种任意值的形式也可以使用 Tailwind 统一的语法进行书写。
而在 v3.0 中,Tailwind 内置了 JIT,无需在配置文件里面声明 JIT 模式,默认就是按需构建、可使用任意辅助类、开发和生产构建方式与产物统一,避免了不一致性、还获得了极大的性能优化。
所有的颜色都开箱即用
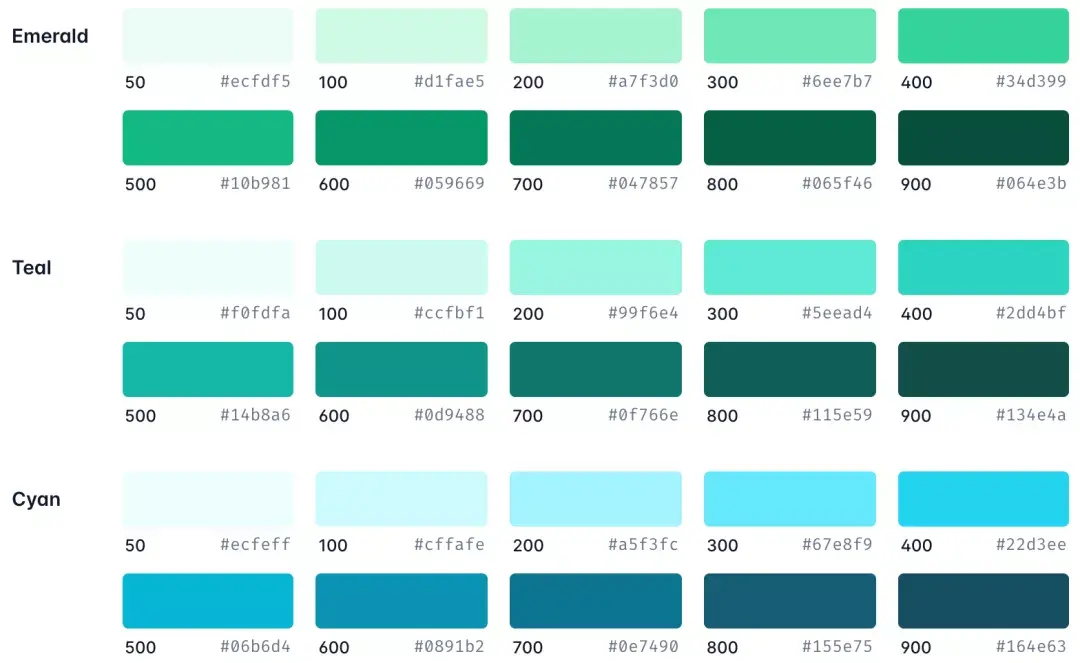
在 v3.0 之前,为了关注在开发模式下 CSS 体积的大小,Tailwind 必须要小心的限制可用的颜色,但是在 v3.0 之后,我们可以引入了很多新的调色板颜色,如 cyan(天蓝色)、rose(玫瑰色)、fuchsia(紫红色)、lime(酸橙色)以及 15 中灰色的阴影,而无需担心日益增大的 CSS 文件体积。
支持有颜色的阴影
之前 Tailwind 想要以一种组合式的方式支持带颜色的阴影是很困难的,虽然长期以来,用户都在述求这一项功能,但是一直也没有实现。经过 5 次失败的尝试,最终在 Tailwind v3.0 中实现了这项功能,现在你可以在 Tailwind 中使用这些有颜色的阴影了:
比如下述代码:
<button class="bg-cyan-500 shadow-lg shadow-cyan-500/50 ...">Subscribe</button><button class="bg-blue-500 shadow-lg shadow-blue-500/50 ...">Subscribe</button><button class="bg-indigo-500 shadow-lg shadow-indigo-500/50 ...">Subscribe</button>可以得到如下的效果:

滚动捕捉 API
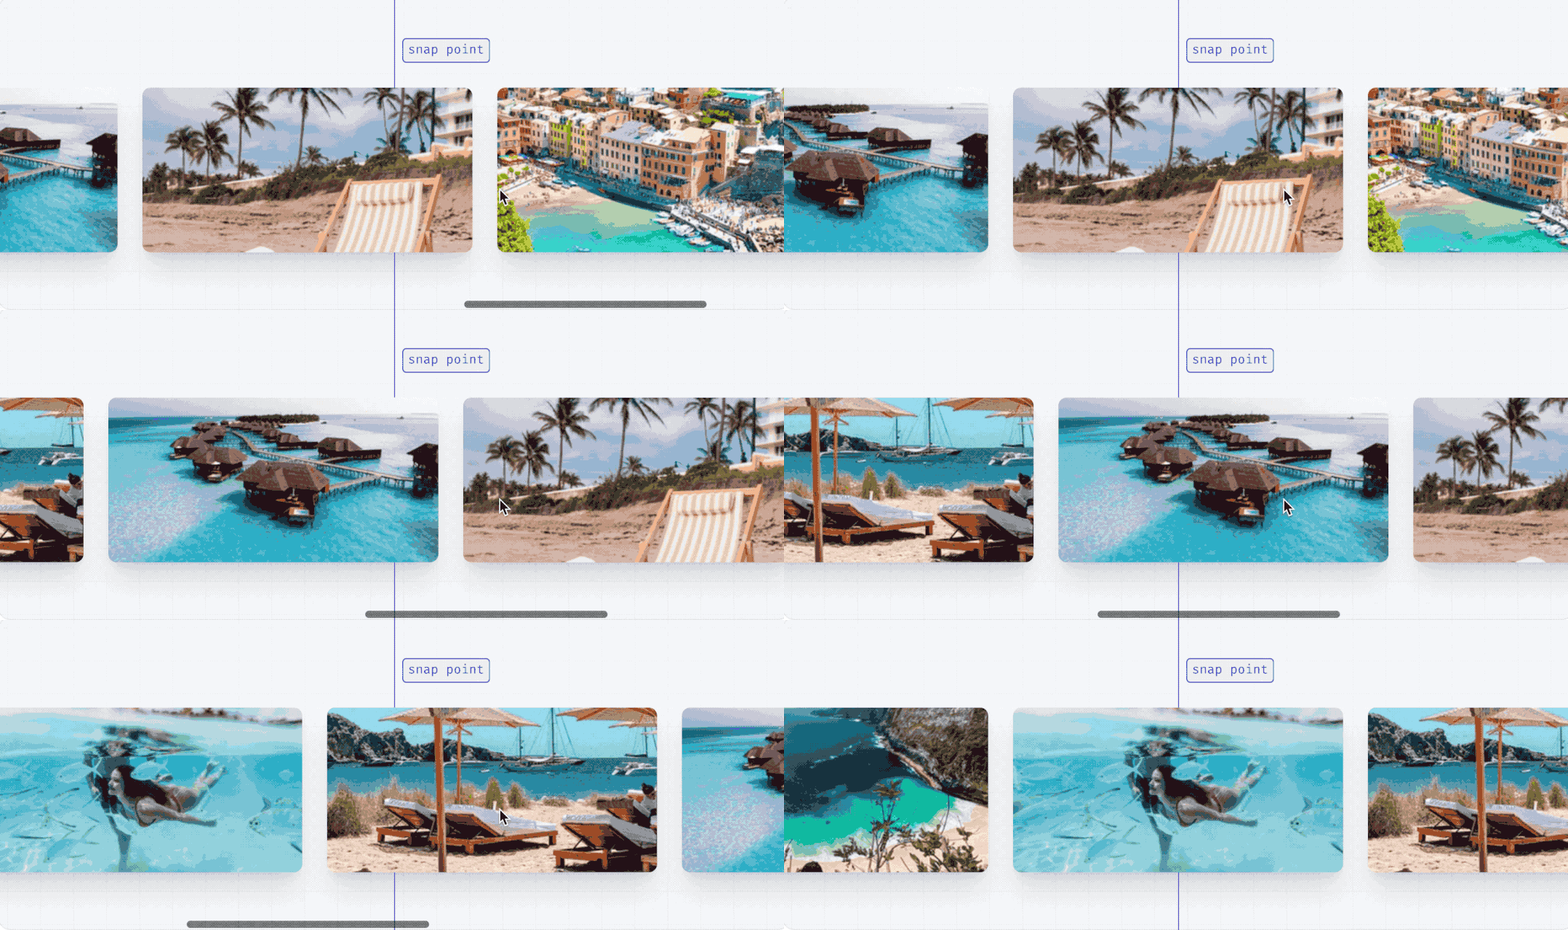
我们加入了一个完善的用于实现 CSS 滚动捕捉模块的辅助类集合,使得你可以直接在 HTML 里面实现非常丰富的滚动捕捉的效果:
什么是滚动捕捉?也就是滑动到下一个 Item 时,可以选择滑动到此 Item 的某个位置,比如下列的定位在图片中间。
而上面的效果只需要如下的较为简单的 Tailwind 辅助类:
<div class="snap-x ..."> <div class="snap-center ..."> <img src="https://images.unsplash.com/photo-1604999565976-8913ad2ddb7c?ixlib=rb-1.2.1&ixid=MnwxMjA3fDB8MHxwaG90by1wYWdlfHx8fGVufDB8fHx8&auto=format&fit=crop&w=320&h=160&q=80" /> </div> <div class="snap-center ..."> <img src="https://images.unsplash.com/photo-1540206351-d6465b3ac5c1?ixlib=rb-1.2.1&ixid=MnwxMjA3fDB8MHxwaG90by1wYWdlfHx8fGVufDB8fHx8&auto=format&fit=crop&w=320&h=160&q=80" /> </div> <div class="snap-center ..."> <img src="https://images.unsplash.com/photo-1622890806166-111d7f6c7c97?ixlib=rb-1.2.1&ixid=MnwxMjA3fDB8MHxwaG90by1wYWdlfHx8fGVufDB8fHx8&auto=format&fit=crop&w=320&h=160&q=80" /> </div> <div class="snap-center ..."> <img src="https://images.unsplash.com/photo-1590523277543-a94d2e4eb00b?ixlib=rb-1.2.1&ixid=MnwxMjA3fDB8MHxwaG90by1wYWdlfHx8fGVufDB8fHx8&auto=format&fit=crop&w=320&h=160&q=80" /> </div> <div class="snap-center ..."> <img src="https://images.unsplash.com/photo-1575424909138-46b05e5919ec?ixlib=rb-1.2.1&ixid=MnwxMjA3fDB8MHxwaG90by1wYWdlfHx8fGVufDB8fHx8&auto=format&fit=crop&w=320&h=160&q=80" /> </div> <div class="snap-center ..."> <img src="https://images.unsplash.com/photo-1559333086-b0a56225a93c?ixlib=rb-1.2.1&ixid=MnwxMjA3fDB8MHxwaG90by1wYWdlfHx8fGVufDB8fHx8&auto=format&fit=crop&w=320&h=160&q=80" /> </div></div>在一个 snap 容器里,snap-center、snap-start 等是用于滚动定位的设置项,而 Scroll Margin 则是用于设置相对于定位的偏移,使用形如 scroll-m{side}-{size} 这样的格式进行设置,如 scroll-ml-6 ,则是相对左边再偏移 6 个单位的长度:
<div class="snap-x ..."> <div class="scroll-ml-6 snap-start ..."> <img src="https://images.unsplash.com/photo-1604999565976-8913ad2ddb7c?ixlib=rb-1.2.1&ixid=MnwxMjA3fDB8MHxwaG90by1wYWdlfHx8fGVufDB8fHx8&auto=format&fit=crop&w=320&h=160&q=80" /> </div> <div class="scroll-ml-6 snap-start ..."> <img src="https://images.unsplash.com/photo-1540206351-d6465b3ac5c1?ixlib=rb-1.2.1&ixid=MnwxMjA3fDB8MHxwaG90by1wYWdlfHx8fGVufDB8fHx8&auto=format&fit=crop&w=320&h=160&q=80" /> </div> <div class="scroll-ml-6 snap-start ..."> <img src="https://images.unsplash.com/photo-1622890806166-111d7f6c7c97?ixlib=rb-1.2.1&ixid=MnwxMjA3fDB8MHxwaG90by1wYWdlfHx8fGVufDB8fHx8&auto=format&fit=crop&w=320&h=160&q=80" /> </div> <div class="scroll-ml-6 snap-start ..."> <img src="https://images.unsplash.com/photo-1590523277543-a94d2e4eb00b?ixlib=rb-1.2.1&ixid=MnwxMjA3fDB8MHxwaG90by1wYWdlfHx8fGVufDB8fHx8&auto=format&fit=crop&w=320&h=160&q=80" /> </div> <div class="scroll-ml-6 snap-start ..."> <img src="https://images.unsplash.com/photo-1575424909138-46b05e5919ec?ixlib=rb-1.2.1&ixid=MnwxMjA3fDB8MHxwaG90by1wYWdlfHx8fGVufDB8fHx8&auto=format&fit=crop&w=320&h=160&q=80" /> </div></div>如上述代码,snap-center 则会在滚动的时候定位在图片的开始位置,而加了 scroll-ml-6 之后,会再相对左边偏移 6 个单位,变成如下效果:

多列布局
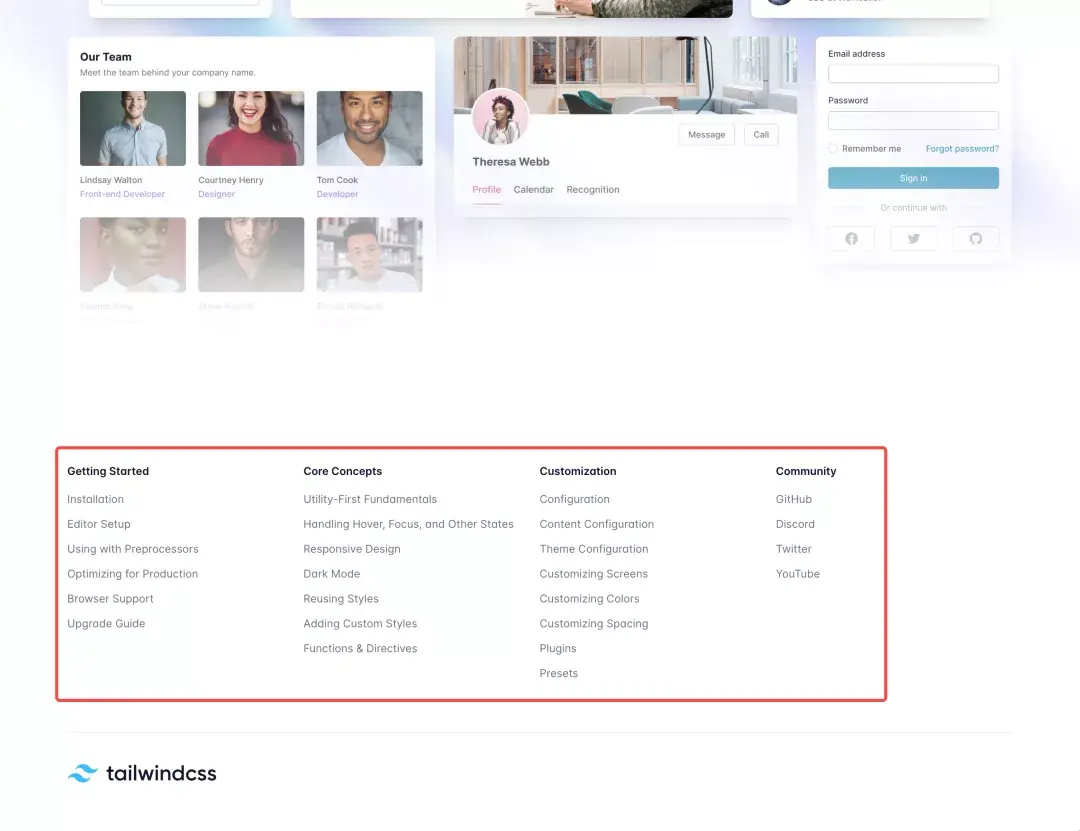
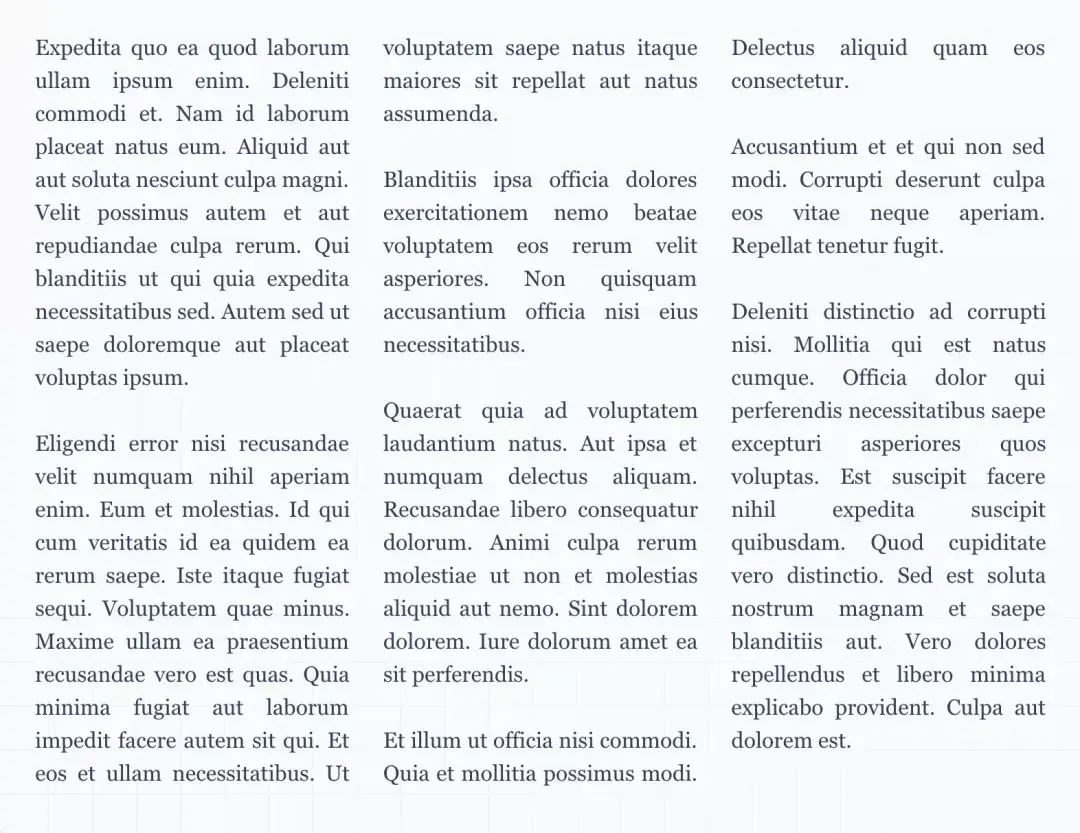
我们加入了 columns 列布局支持,也被称之为 “新闻版式布局” 类型,这种布局非常有用,同时应用在底部的导航栏布局设计时也是非常有用的。
如我们大多数网站底部的多列导航栏设计,以 Tailwind 官网为例:
当你使用对应的辅助类如下时:
<div class="columns-1 sm:columns-3 ..."> <p>...</p> <!-- ... --></div>你可以获得如下的效果:
原生的表单控制样式
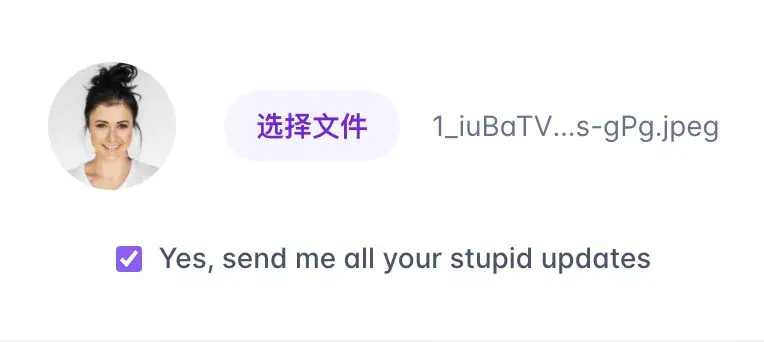
我们加入了对 CSS accent-color 属性的支持,如为表单里面的文件输入框按钮添加样式,这使得你能够细粒度的为原生的表单控制按钮添加样式,如下代码:
<form> <div class="flex items-center space-x-6"> <div class="shrink-0"> <img class="h-16 w-16 object-cover rounded-full" src="https://images.unsplash.com/photo-1580489944761-15a19d654956?ixlib=rb-1.2.1&ixid=MnwxMjA3fDB8MHxwaG90by1wYWdlfHx8fGVufDB8fHx8&auto=format&fit=crop&w=1361&q=80" alt="Current profile photo" /> </div> <label class="block"> <span class="sr-only">Choose profile photo</span> <input type="file" class="block w-full text-sm text-gray-500 file:mr-4 file:py-2 file:px-4 file:rounded-full file:border-0 file:text-sm file:font-semibold file:bg-violet-50 file:text-violet-700 hover:file:bg-violet-100 "/> </label> </div> <label class="mt-6 flex items-center justify-center space-x-2 text-sm font-medium text-gray-600"> <input type="checkbox" class="accent-violet-500" checked/> <span>Yes, send me all your stupid updates</span> </label></form>可以获得如下效果:
为选择文件前:

选择文件后:
打印修饰符
我们添加了 print 修饰符,使得你可以在用户打印你的网站时如何展现:
<div> <article class="print:hidden"> <h1>My Secret Pizza Recipe</h1> <p>This recipe is a secret, and must not be shared with anyone</p> <!-- ... --> </article> <div class="hidden print:block"> Are you seriously trying to print this? It's secret! </div></div>比如上述的代码逻辑为,在打印模式下,第一个 article 块不展示,而 div 块展示。
现代aspectratioAPI
我们添加了原生的 aspect ratio ****属性的支持,因为现在浏览器的支持度已经非常高了,即我们可以获得比较完美的横纵比。
比如如下代码,可以设置视频的最佳横纵比:
<iframe class="w-full aspect-video ..." src="https://www.youtube.com/..."></iframe>上述代码得到如下结果:

好看的下划线样式
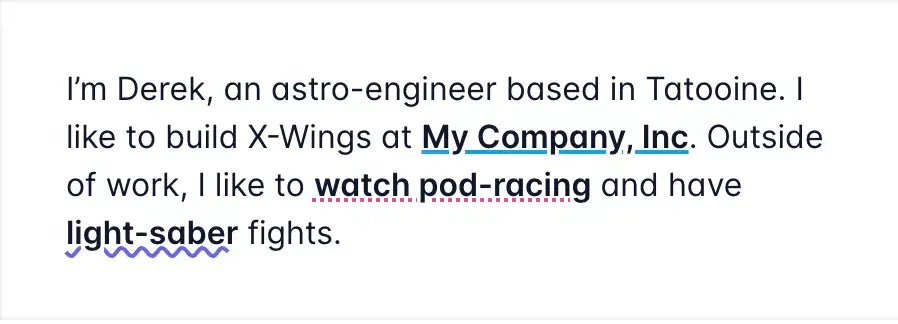
我们现在也支持修改下划线的颜色、粗细等属性了~
如下面的代码:
<p> I’m Derek, an astro-engineer based in Tatooine. I like to build X-Wings at <a href="#" class="underline decoration-sky-500 decoration-2">My Company, Inc</a>. Outside of work, I like to <a href="#" class="underline decoration-pink-500 decoration-dotted decoration-2">watch pod-racing</a> and have <a href="#" class="underline decoration-indigo-500 decoration-wavy decoration-2">light-saber</a> fights.</p>可以得到如下的效果:
RTL 与 LTR 修饰符
我们也加入了对 RTL(从右到左)与 LTR(从做到右)等多方向布局的实验性支持,如下代码:
<div class="group flex items-center"> <img class="shrink-0 h-12 w-12 rounded-full" src="..." alt="" /> <div class="ltr:ml-3 rtl:mr-3"> <p class="text-sm font-medium text-gray-700 group-hover:text-gray-900">...</p> <p class="text-sm font-medium text-gray-500 group-hover:text-gray-700">...</p> </div></div>可以获得如下效果:

Portrait 与 Landscape 修饰符
我们也添加了在不同屏幕方向的修饰符支持,如 portrait (竖屏)、landscape (横屏)修饰符,使得你可以通过不同的修饰符控制在对应屏幕方向上的样式:
<div> <div class="portrait:hidden"> <!-- ... --> </div> <div class="landscape:hidden"> <p> This experience is designed to be viewed in landscape. Please rotate your device to view the site. </p> </div></div>任意值辅助类支持
虽然看起来不太合理,但是我们依然添加了任意 CSS 值的 Tailwind 辅助类,并使得你可以结合 hover 、lg 等修饰符使用:
<div class="[mask-type:luminance] hover:[mask-type:alpha]"> <!-- ... --></div>或者像 56px 或者 44px 这种任意值,与 lg 修饰符一起使用:
<div class="[--scroll-offset:56px] lg:[--scroll-offset:44px]"> <!-- ... --></div>使用 CDN 来使用 Tailwind
目前没有一个很好的基于 CSS 的 CDN 方式来使用 Tailwind CSS v3.0,所以我们构建了一个 JavaScript 库来帮助你使用它:
<!DOCTYPE html><html lang="en"> <head> <meta charset="utf-8"> <meta name="viewport" content="width=device-width, initial-scale=1.0" /> <title>Example</title> <script src="https://cdn.tailwindcss.com/"></script> </head> <body> <!-- --> </body></html>这种方式仅限于在开发环境下使用,或者当你想构建一个 demo 或者想要尝试一个有趣的想法时,你可以这样使用。只需要在任何想要使用 Tailwind 特性的 HTML 文档里添加 script 标签来引用 https://cdn.tailwindcss.com/ 即可。
以上就是 TailwindCSS v3.0 更新的全部特性了,看到这里,你觉得 TailwindCSS v3.0 怎么样呢?你做好将其用于生产、或者加入构建你下一个应用时的工具箱的准备了?
❤️/ 感谢支持 /
以上便是本次分享的全部内容,希望对你有所帮助^_^
喜欢的话别忘了 分享、点赞、收藏 三连哦~
欢迎关注公众号 **程序员巴士**,来自字节、虾皮、招银的三端兄弟,分享编程经验、技术干货与职业规划,助你少走弯路进大厂。
 鲁公网安备37020202000738号