揭秘3个Python实战项目,值得你点赞收藏!
发表时间: 2022-02-07 14:52
作者:俊欣
今天小编来给大家介绍3个干货满满的计算机视觉方向的Python实战项目,主要用到的库有
要是大家所配置的环境当中没有这几个模块的话,就需要先用pip命令下载安装
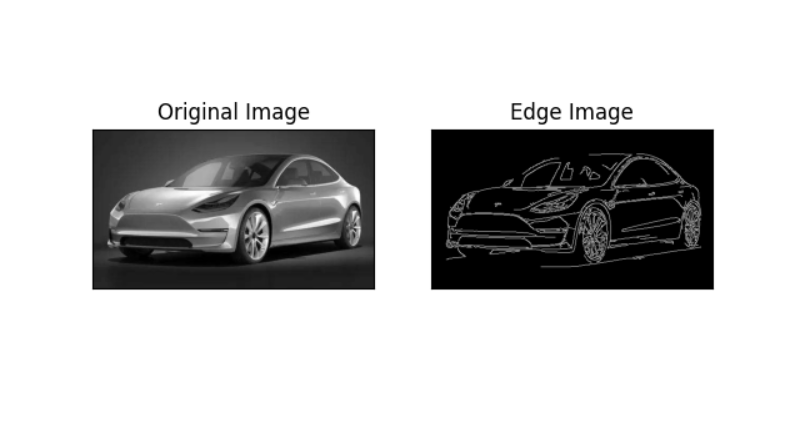
pip install opencv-python numpy pillow边缘检测的基本思想就是简化图像信息,使用边缘线代表图像所携带信息,而这次我们要用到的则是Canny边缘检测算子,在Opencv当中需要调用的是cv.canny()方法即可,代码如下
import cv2 as cvimport matplotlib.pyplot as pltimg = cv.imread('导入图像的路径',0)edges = cv.Canny(img,100,200)plt.subplot(121)plt.imshow(img, cmap='gray').........plt.show()output

我们最终要实现的目的在于将照片变成素描风格,大致的逻辑在于首先需要将图片变成灰色图像然后反转,在反转之后进行模糊化处理,代码如下
import cv2img = cv2.imread("导入照片的路径")## 将照片灰度化处理gray_image = cv2.cvtColor(img,cv2.COLOR_BGR2GRAY)## 将灰度化的照片反转处理inverted_gray_image = 255-gray_image## 将反转的照片模糊化处理blurred_inverted_gray_image = cv2.GaussianBlur(inverted_gray_image, (19,19),0)## 再一次的进行反转inverted_blurred_image = 255-blurred_inverted_gray_image### 颜色减淡混合处理sketck = cv2.divide(gray_image, inverted_blurred_image,scale= 256.0)cv2.imshow("Original Image",img)cv2.imshow("Pencil Sketch", sketck)cv2.waitKey(0)output

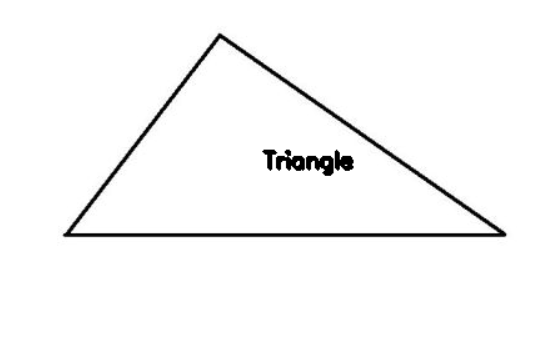
现在我们需要来判断图片当中图形的轮廓,而识别轮廓的算法在opencv模块当中是有内置的,代码如下
import cv2import numpy as npfrom matplotlib import pyplot as plt# 导入照片img = cv2.imread('3.png')# 将照片灰度化处理,当然要是您的照片已经是黑白的,就可以跳过这一步gray = cv2.cvtColor(img, cv2.COLOR_BGR2GRAY)# setting threshold of the gray image_, threshold = cv2.threshold(gray, 127, 255, cv2.THRESH_BINARY)# 识别轮廓的方法contours, _ = cv2.findContours( threshold, cv2.RETR_TREE, cv2.CHAIN_APPROX_SIMPLE)i = 0for contour in contours: # cv2.approxPloyDP() function to approximate the shape approx = cv2.approxPolyDP(contour, 0.01 * cv2.arcLength(contour, True), True) # 找到图片的中心点 M = cv2.moments(contour) if M['m00'] != 0.0: x = int(M['m10'] / M['m00']) y = int(M['m01'] / M['m00']) # 将轮廓的名字放在各个图形的中央 if len(approx) == 3: cv2.putText(img, 'Triangle', (x, y), cv2.FONT_HERSHEY_SIMPLEX, 0.6, (0, 0, 0), 2) elif len(approx) == 4: ....... elif len(approx) == 5: ...... elif len(approx) == 6: ...... else: ......# 将最后的图形呈现出来cv2.imshow('shapes', img)cv2.waitKey(0)cv2.destroyAllWindows()output
